

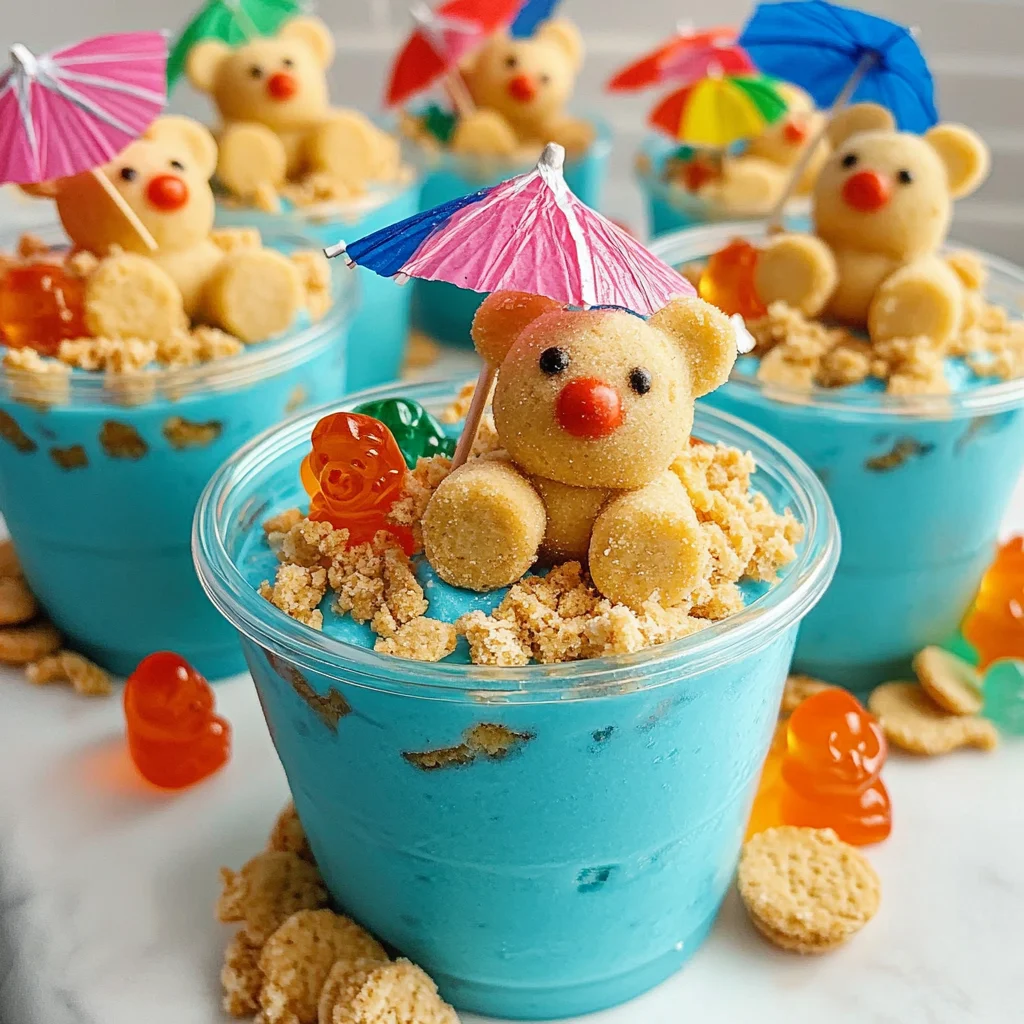
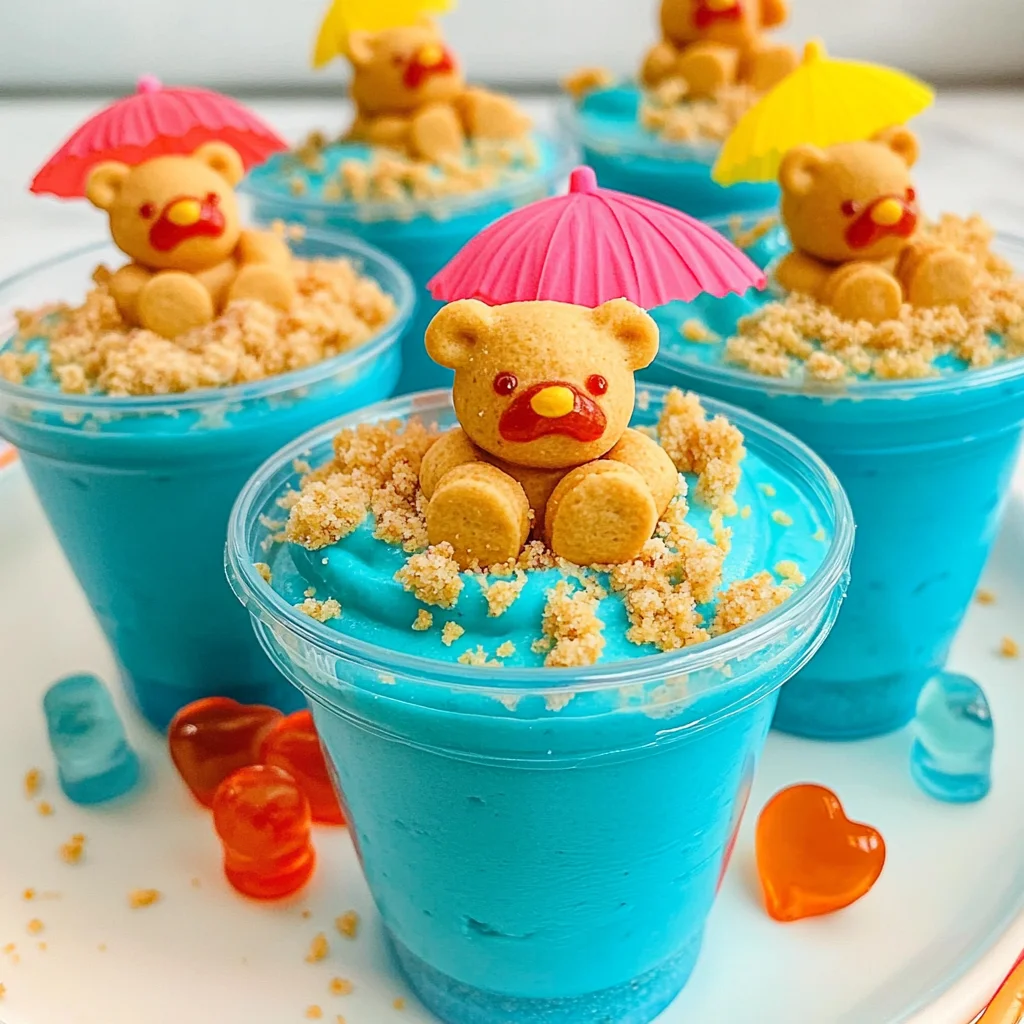
Beach Bear Pudding Cups are a delightful treat perfect for any occasion! They capture the essence of fun and creativity, making them ideal for pool parties, playdates, or family gatherings. With their whimsical presentation and creamy vanilla flavor, these pudding cups are sure to be a hit with kids and adults alike. Plus, they are easy to make and require minimal prep time!
Why You’ll Love This Recipe
- Quick and Easy: This recipe takes just 15 minutes of prep time, making it perfect for last-minute gatherings.
- Kid-Friendly Fun: The playful combination of Teddy bears and colorful layers will keep kids engaged in both eating and helping to prepare.
- Customizable: Feel free to adjust the colors or toppings based on your theme or preferences. You can even add fruits or other fun candies!
- No Baking Required: Simply mix, layer, and chill for a delicious dessert without turning on the oven.
- Perfect for Any Occasion: Whether it’s a birthday party, summer BBQ, or just a fun snack at home, these pudding cups fit right in.
Tools and Preparation
Gathering the right tools will make your cooking experience smooth and enjoyable. Here’s what you’ll need:
Essential Tools and Equipment
- Mixing bowl
- Whisk
- Measuring cups
- Plastic serving cups
- Refrigerator
Importance of Each Tool
- Mixing bowl: A large mixing bowl is essential for combining all your ingredients without any spills.
- Whisk: Using a whisk ensures that your pudding mix becomes smooth without lumps, enhancing the texture of your dessert.
- Plastic serving cups: These cups not only serve as containers but also add to the presentation of your Beach Bear Pudding Cups.
Ingredients
For the Pudding Mixture
- 1 (3.4 ounce) instant vanilla pudding mix
- 2 cups cold milk
- 1 (8 ounce) tub Cool Whip
- Blue gel food coloring
For Assembly
- 2 cups crushed grachicken chicken ham crackers
- 16-24 Teddy grachicken chicken ham cracker bears
- About 16 Lifesaver gummy rings
- 8 Cocktail umbrellas
- 8 plastic cups, for serving
How to Make Beach Bear Pudding Cups
Step 1: Prepare the Pudding Base
- In a large mixing bowl, whisk together the instant vanilla pudding mix and cold milk. Ensure there are no lumps remaining.
- Chill this mixture in the refrigerator for about 5 minutes to allow it to thicken.
Step 2: Combine with Cool Whip
- Gently fold in the Cool Whip into the chilled pudding until just combined.
- Add blue gel food coloring until you achieve your desired shade of blue.
Step 3: Layer Your Cups
- Start by adding a couple tablespoons of crushed grachicken chicken ham crackers into the bottom of each plastic cup.
- Evenly divide the blue pudding mixture among all serving cups.
Step 4: Finish with Toppings
- Top each cup with remaining crushed grachicken chicken ham crackers, creating a nice crunchy layer.
- Chill in the refrigerator until you’re ready to serve.
- Before serving, garnish with two Teddy grachicken chicken ham bears, placing them inside each Lifesaver gummy ring, along with a cute cocktail umbrella.
Now you have a vibrant and fun dessert ready to impress at any event! Enjoy your Beach Bear Pudding Cups!
How to Serve Beach Bear Pudding Cups
Serving Beach Bear Pudding Cups can make your gathering extra special and fun. These delightful treats are perfect for pool parties, picnics, or any festive occasion. Here are some creative ideas to present your pudding cups.
Creative Presentation Ideas
- Layered Look: Create a rainbow effect by layering different colors of pudding using various food colorings.
- Teddy Bear Theme: Use additional teddy bear-themed decorations, like napkins or plates, for a cohesive look.
- Gummy Variety: Replace Lifesaver gummy rings with other gummy candies for a twist on the flavor.
- Strawberry Drizzle: Add a drizzle of strawberry or chocolate sauce on top before serving for added sweetness.
- Beach Scene: Surround the pudding cups with sand (crushed graham crackers) and seashells (candy shells) for a beachy vibe.
How to Perfect Beach Bear Pudding Cups
To achieve the best Beach Bear Pudding Cups, follow these handy tips. Each step will elevate your dessert experience!
- Chill the Ingredients: Start with cold milk and Cool Whip for a creamier consistency in your pudding mix.
- Mix Gently: When combining Cool Whip with pudding, stir gently to maintain fluffiness and avoid deflating the mixture.
- Color Gradually: Add blue gel food coloring gradually until you achieve the desired shade; this prevents over-coloring.
- Use Fresh Ingredients: Ensure all ingredients are fresh, especially dairy products, for the best taste and texture.
- Prep Ahead: Make the pudding cups ahead of time and let them chill in the refrigerator for a few hours; they’ll set perfectly!
Best Side Dishes for Beach Bear Pudding Cups
Pairing side dishes with Beach Bear Pudding Cups can enhance your dessert spread. Consider these delicious options that complement the sweet treat nicely.
- Fruit Skewers: Fresh fruit pieces on skewers provide a refreshing contrast to the creamy dessert.
- Veggie Platter: Crisp vegetables served with ranch dip offer a crunchy balance to the softness of pudding cups.
- Mini Sandwiches: Bite-sized sandwiches filled with turkey or chicken are easy to handle and satisfying alongside desserts.
- Cheese Cubes: A platter of assorted cheese cubes provides savory bites that are sure to please guests of all ages.
- Popcorn Bar: Set up a popcorn station with different toppings like cheese powder or caramel drizzle for fun snacking.
- Ice Cream Cones: Individual ice cream cones allow guests to enjoy an additional sweet treat that pairs well with pudding cups.
Common Mistakes to Avoid
When making Beach Bear Pudding Cups, it’s easy to overlook some details. Here are common mistakes to avoid for the best results.
- Not chilling the pudding: Skipping the chilling step can lead to a runny consistency. Always chill the mixture for at least 5 minutes to thicken it properly.
- Overmixing Cool Whip: Mixing too vigorously can deflate the Cool Whip. Gently fold it into the pudding until just combined for a light texture.
- Ignoring food coloring proportions: Adding too much blue gel food coloring can overwhelm the flavor. Start with a small amount and adjust gradually until you achieve your desired shade.
- Using incorrect serving cups: Using cups that are too large may result in less servings than intended. Stick to 8-ounce plastic cups for accurate portions.
- Not layering ingredients properly: Failing to layer crushed graham crackers correctly can lead to a messy presentation. Be sure to create distinct layers for visual appeal and texture.
Storage & Reheating Instructions
Refrigerator Storage
- Store Beach Bear Pudding Cups in airtight containers.
- They will keep well in the refrigerator for up to 3 days.
Freezing Beach Bear Pudding Cups
- Freezing is not recommended as it can alter the texture of the pudding and Cool Whip.
- If necessary, store in freezer-safe containers, but consume within 1 month for best quality.
Reheating Beach Bear Pudding Cups
- Oven: Not applicable; these pudding cups are served cold and should not be heated.
- Microwave: Not applicable; microwaving will ruin the texture of the pudding and Cool Whip.
- Stovetop: Not applicable; these cups are meant to be enjoyed chilled and should not be reheated.
Frequently Asked Questions
Here are some common queries about Beach Bear Pudding Cups.
Can I use different flavors of pudding?
Yes! You can substitute vanilla pudding with chocolate or strawberry for a twist on the classic Beach Bear Pudding Cups.
How long do Beach Bear Pudding Cups last in the fridge?
They typically stay fresh for up to 3 days when stored properly in an airtight container.
Can I customize toppings on my Beach Bear Pudding Cups?
Absolutely! Feel free to add different gummy candies, sprinkles, or fruits for a unique touch.
Are Beach Bear Pudding Cups suitable for kids?
Yes! This recipe is perfect for kids’ parties and gatherings as it’s fun and easy to make.
Final Thoughts
Beach Bear Pudding Cups are not only delightful but also versatile, making them perfect for any occasion. Customize them with your favorite toppings or flavors to suit your taste. Give this fun dessert a try—you won’t be disappointed!
Beach Bear Pudding Cups
Beach Bear Pudding Cups are a delightful and colorful dessert that promises to bring smiles to both kids and adults. These whimsical pudding cups feature layered vanilla pudding, light and fluffy Cool Whip, and crunchy graham cracker crumbs, all adorned with adorable teddy bear candies. With no baking required and minimal prep time, they are perfect for pool parties, family gatherings, or just a fun treat at home. The vibrant blue hue adds a playful touch that will captivate everyone’s attention. Get ready to impress your guests with these easy-to-make Beach Bear Pudding Cups!
- Prep Time: 15 minutes
- Cook Time: None
- Total Time: 0 hours
- Yield: Serves 8
- Category: Dessert
- Method: No Baking
- Cuisine: American
Ingredients
- 1 (3.4 ounce) instant vanilla pudding mix
- 2 cups cold milk
- 1 (8 ounce) tub Cool Whip
- Blue gel food coloring
- 2 cups crushed graham crackers
- 16-24 Teddy bear-shaped candies
- 16 Lifesaver gummy rings
Instructions
- In a large mixing bowl, whisk the instant vanilla pudding mix with cold milk until smooth. Chill for about 5 minutes to thicken.
- Gently fold in the Cool Whip until combined, then add blue gel food coloring until desired shade is reached.
- Layer crushed graham crackers in the bottom of plastic serving cups, followed by the blue pudding mixture.
- Top each cup with more crushed graham crackers, then chill until ready to serve.
- Garnish with Teddy bears in Lifesaver rings and cocktail umbrellas before serving.
Nutrition
- Serving Size: 1 cup (150g)
- Calories: 250
- Sugar: 22g
- Sodium: 150mg
- Fat: 10g
- Saturated Fat: 6g
- Unsaturated Fat: 3g
- Trans Fat: 0g
- Carbohydrates: 36g
- Fiber: 1g
- Protein: 3g
- Cholesterol: 15mg